 Ply Yard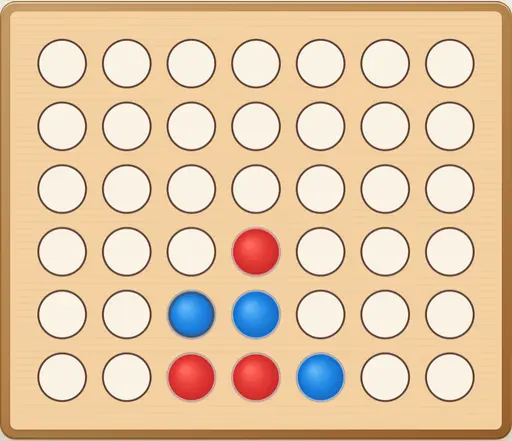
About Connect Four
Connect Four is played by selecting a column, not by choosing any empty square. A disc lands on the lowest vacancy, so a threat must be classified as immediately playable or dependent on support. Adding that support can give the opponent access to a winning square. This guide combines the result-checking order with concrete landing calculations, then develops the distinction between potential lines, immediate wins, and double threats through practice.
- Ruleset covered
- 7×6 gravity Connect Four: Red moves first; Blue moves second
- Updated
- · Editorial policy and corrections
Connect FourRules and variant distinctions
Gravity determines the landing square
Choose one of the seven columns and drop a disc into it. The disc occupies that column's lowest empty square. A full column cannot accept another disc, and a disc already played cannot move, be removed, or change color. Four consecutive discs of your color in a horizontal, vertical, or diagonal line win immediately. Check for a winning line after every drop. Only if no line has won and all 42 squares are occupied is the game a full-board draw. A final drop that fills the board and completes four in a row is a win, not a draw. The landing and result checks are part of one completed move; play does not continue after a winning line appears.
Choose a column, then evaluate the resulting position
Red moves first and Blue second in this platform version. Each turn adds one disc to a column with space remaining. You choose the column, not the row: the current stack determines where the disc lands. After the disc lands, check for four in a row before checking for a full-board draw. If neither condition ends the game, the other player takes the next turn. Completing two winning lines with one drop still produces one game result. When choosing a move, look for an immediate legal win first. If none exists, identify the opponent's immediately playable winning drops. A visually open gap above an empty square is not yet a place where either player can land a disc.
Seven columns, six rows, and the value of the center
The board is seven columns wide and six rows high. In this guide, columns are a–g from left to right and rows are 1–6 from bottom to top. An empty column receives its first disc on row 1, its next on row 2, and so on. Winning lines may be horizontal, vertical, or diagonal in either direction. The center column participates in more four-square line segments than an edge column, which helps explain its opening value. That is a strategic property, not a rule: Red may legally open in any column. If an edge column contains your immediate winning drop or the only available defense, that concrete need overrides a general preference for the center. Evaluate actual landing squares and replies rather than treating central occupancy as proof of an advantage.
Immediate wins, playable threats, and double threats
A winning drop completes a line of four and ends the game, even with empty squares remaining. A drop that completes more than one line is still one win. A potential threat is different: its required landing square may not yet be supported from below. Record whether each candidate winning square is playable now. Filling a support square can make the square above available to the next player, so an apparently helpful move may enable an opposing win. Analyze who moves after each supporting drop. A double threat creates two distinct, immediately playable winning drops that cannot both be neutralized by one reply. Check that the opponent has no immediate winning move of their own before concluding that the threat forces a win. Two attractive gaps are not a decisive double threat if either is inaccessible or both rely on an untested sequence of support moves.
Reconstruct a legal seven-move win
Starting from an empty board, play these columns in order: 1. Red c; 2. Blue a; 3. Red d; 4. Blue a; 5. Red e; 6. Blue b; 7. Red f. Every selected column has space for the disc. Red's four discs land on c1, d1, e1, and f1, completing a horizontal line on the seventh move. Blue's discs occupy a1, a2, and b1. The game ends immediately, with most of the board still empty. This sequence illustrates gravity and the timing of a win, not a forced opening against correct defense. Blue could have addressed Red's developing bottom-row threat earlier. In a review, identify the neglected winning drops rather than treating a short example as a universally winning sequence.
Draws and the distinction between legal and optimal play
A full-board draw requires all 42 squares to be occupied without either player having completed a winning line. Check the last drop for a win before recording that draw. In an online room, an accepted draw offer can also end the game earlier; resignation instead awards the win to the opponent. Unlike standard tic-tac-toe, the standard 7×6 gravity game is theoretically a first-player win with a center opening and correct subsequent play. That result does not mean any center opening wins automatically or that every legal continuation is optimal. For practical improvement, review missed immediate wins, unsupported threat squares, and moves that gave the opponent a playable winning square. Explain the specific error and forced reply rather than using the solved starting-position result as a substitute for calculation.
Practical strategy
Drop three discs consecutively into an initially empty column, alternating sides as in a legal game. Record the landing row after each drop.
Identify rows 1, 2, and 3 in order. Explain why the lowest empty square determines every landing and why a column becomes unavailable after six discs.
From a position containing three aligned discs, list the empty squares that would complete four. Mark which of those squares are currently playable.
Separate immediate winning drops from potential wins requiring support. Check the current height of every relevant column rather than marking empty cells alone.
Review a move that adds support below a possible winning square. Determine which player can reach that square on the following turn.
Explain the turn order and the resulting landing height. Do not treat a suspended three-disc line as an immediate forced win.
A common misconception
Any visible empty gap can be selected as a disc's destination.
Gravity determines the landing row. The player chooses a column, not an arbitrary square within it.
Position study: An empty gap is not necessarily a playable square
A local Red four-in-a-row pattern on row 3 has its missing square at d3, but d1 and d2 are still empty. Blue is to move. Other columns do not change the landing square in column d.
Can Blue select column d and block d3 immediately?
Show the answer and analysis
No. The disc lands on d1. A disc can reach d3 only after both lower squares are occupied. Whether there is time to supply that support through forcing play must be checked in the complete position; this local example establishes the landing rule, not a forced outcome.
Track the playability of each threat square, not merely its emptiness. Filling the same column can make the opponent's potential winning square available. Column height and move order must support every claimed win or defensive block.
This position was constructed for instruction. It is not a tournament record or an engine-verified proof of an optimal move. Evaluate it under the stated conditions; do not assume unlisted features of the complete position.
Structured practice
Understand the rules
Drop three discs into an initially empty column and write the actual landing row after each move.
Assessment: Every disc lands on the lowest empty square, and a full column cannot receive another disc.
Compare candidate moves
Identify all squares that complete four from a three-disc pattern. Mark which winning squares are playable in the current position.
Assessment: Distinguish immediate winning drops from potential wins that require supporting discs below them.
Review and verify
Review a supporting drop and determine which player obtains a playable winning square on the following turn.
Assessment: Explain the order of threats and replies without treating an unsupported three-disc line as an immediate forced win.
Frequently asked questions
Is a final drop that fills the board and makes four in a row a win or a draw?
It is a win. After every drop, check for a completed horizontal, vertical, or diagonal line before checking whether the board is full. A full-board draw applies only when the final drop does not complete a winning line and no earlier move has already ended the game.
What happens if one disc completes two winning lines?
The player wins one game. Both lines may be valid, but the drop produces a single result rather than two wins. This is different from a double threat, which leaves separate winning drops for a future turn without necessarily ending the game immediately.
Must the first move be in the center column?
No. Red may open in any column because all seven are initially available. The center participates in the most four-square line segments and is strategically important, but center play is not a legality requirement. Later in the game, an immediate win or necessary defense can make a different column the correct choice.
Can I move a disc after it has landed?
No. Each turn adds one disc to a non-full column. Existing discs cannot move, be extracted, or be placed at a different height. You also cannot choose an unsupported empty row: the new disc must occupy the selected column's lowest empty square.
Does Red move first in every play mode?
Yes. Red moves first and Blue second in computer play, same-device play, and online rooms. Against the computer, you may choose Red or Blue. If you choose Blue, the computer makes the first drop as Red. These colors describe the platform's board, regardless of the colors used by a physical edition.
Does error-free play by both players necessarily produce a draw?
No. Under standard 7×6 gravity rules, the first player can force a win by opening in the center and continuing correctly. This is a result about optimal play, not a guarantee for arbitrary center-based play. Practical losses often come from overlooking a playable winning drop or allowing a decisive double threat; calculate the position rather than assuming the theoretical result decides your next move.
Can Blue choose column d and immediately block the gap on d3?
Not when d1 and d2 are empty, as in the example. Blue's disc lands on d1. Reaching d3 requires the two lower squares to be filled first, and the complete position determines whether there is time to do that safely. A supporting drop may instead make Red's winning square playable on a later turn. Track column height and move order, not just the visible gap.
Can I place a disc in any empty gap I can see?
No. You select a column, and gravity fixes the landing row. A gap above another empty square cannot be filled directly. To analyze a threat, distinguish an empty square from a currently playable landing square and check who will gain access after support is added.
Put your understanding into practice.
Choose one skill to work on in your next game. A clear reason for each move is more useful than an immediate win.
Play Connect FourRules sources and editorial notes
- Current rules for this game on Ply Yard
Identifies the board variant and interface described here. Platform instructions are not a complete statement of every tournament ruleset.
This guide combines the relevant board's rules with independently constructed examples and exercises. It distinguishes basic rules, variant-specific provisions, and strategic advice. Rules sections draw on the sources listed above. Instructional positions have not been presented as exhaustively engine-verified or certified by professional players.
Written by Ply Yard. Independent review by a named professional player has not been completed. To report an issue, send the game, ruleset, position, and relevant source provision to contact@plyyard.com.